本文最后更新于 1 年前,文中所描述的信息可能已发生改变。
官网对于 Serverless Functions 的介绍:https://vercel.com/docs/concepts/functions/serverless-functions
总的来说,Vercel 的 Serverless Functions 允许我们使用 Golang、Node.js、Python、Ruby 语言编写,然后可以通过 API 访问。
这是我用 Vercel 的 Serverless Functions 写的一个小项目:https://github.com/Rotten-LKZ/anidb-search
本文章将用 Node.js 尝试搭建 Vercel 的 Serverless Functions。
安装过程
首先 Vercel 的 Serverless Functions 是同时支持 JavaScript 和 TypeScript 的,这里将用 TypeScript 进行演示。
安装 TypeScript 环境
首先先装上对应 Node.js 版本的类型声明以及 Vercel 的 Serverless Functions 的类型声明:
pnpm add -D @types/node@16 typescript @vercel/node
其次 pnpm exec tsc --init 或 npx tsc --init 生成 tsconfig.json 文件。(可以根据自己需求修改里面内容)
全局安装 Vercel CLI
Vercel 提供了 CLI,以供我们更方便地部署和使用 Serverless Functions:
npm install -g vercel
写代码
在根目录下建立文件夹 api,创建 app.ts,写入以下代码:
import type { VercelRequest, VercelResponse } from '@vercel/node'

export default (request: VercelRequest, response: VercelResponse) => {
  const { name } = request.query
  response.status(200).send(`Hello ${name}!`)
}
调试
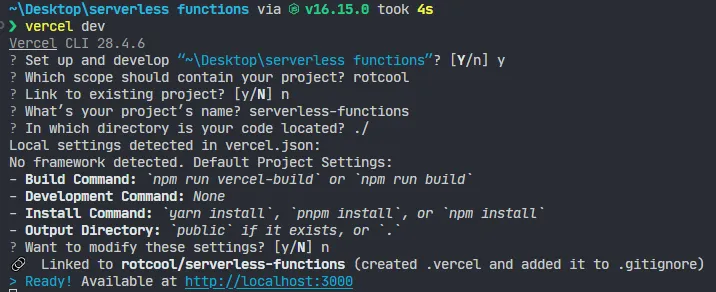
输入:
vercel dev
第一次使用会让你登录,跟着提示登录一下,配置一下项目名称等内容即可。

之后打开 http://localhost:3000/api/app?name=test 就可以看到对应的输出 Hello test 了。
文件名就是对应 http://localhost:3000/api/app?name=test 中 xxx 的名字。
然后就可以点进去看看类型声明,进行相应的开发。注意一点的就是,它可能在 vercel dev 下面是现场编译 .ts 文件,所以访问速度可能相对于生产环境慢几秒,属于正常情况。
打包
输入 vercel --prod 然后就会出来可以访问的链接。自己上 Vercel 找到本项目绑定自己的域名就能当 API 使用了!


